9/8 - 9/12
- bhallahan403
- Sep 12, 2025
- 3 min read
This week, I was working on finishing the key holder while I wait for my panel mount to come in. On Monday, I finished the visual part of the design for my key holder. At the end, I wasn't sure how I wanted to mount it on the wall yet, so I saved that for after.
On Tuesday, I was looking up different ways people would hang up a key holder. I was specifically looking for alternatives that didn't involve drilling holes into the wall, because I'm not allowed to. I found one where someone just put strings through it and used a command-hook to hang it on the wall. I used this and finished the design of the key holder in CAD.
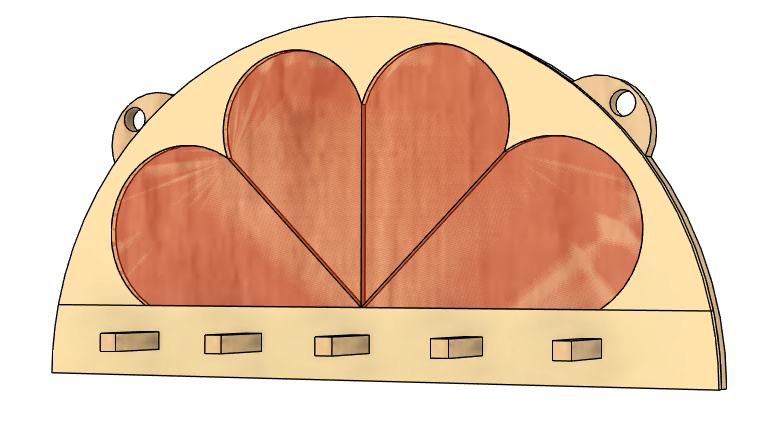
On Wednesday, I cut out the parts of the key holder in cardboard and assembled a test version of it. I just cut out the pegs in wood, since I needed them to be a specific size that I couldn't accurately get using cardboard. I also remembered that we had some orange acrylic in the shop, so I cut that out to see if I could use it for the orange parts of the design. After I put in the orange acrylic pieces, I didn't end up liking the color. The orange was too vibrant and neon and wasn't what I was looking for. So, my next option is to print out those pieces in regular white acrylic and just paint those pieces with an orange shade that is more what I'm looking for. Jaspreet and I also started brainstorming some ideas we would bring to Mr. L for mounting the giant word clock on the wall.


On Thursday, Jaspreet and I talked with Mr. L and came up with a possible idea for how we would mount the word clock on the wall. We're planning on using the CNC router to cut out a completely different design for the structure holding the word clock. First of all, we didn't like the wooden slab it currently lays on because the letter blocks go to the very edge of it, and it was really difficult trying to figure out a way to mount it, considering there isn't really anywhere to drill any holes into it or anything. We decided we wanted to add at least 3 inches around the perimeter to give us some more space to work with. It also didn't have any holes to screw in the LEDs that have been inside the letter blocks and attached to the wooden slab using double sided tape. Obviously double sided tap isn't reliable and the LEDs kept coming lose, so we had to figure out a more stable alternative.
We also wanted to have it shaped as kind of a box, so that the wires weren't directly on the wall, and we needed to figure out a space that could hold the power supply. With Mr. L's help, we came up with a design that has sides going back 4 inches, and Jaspreet and I decided we wanted to add a back because it'd be easier to mount and it will give us a place to attach a 3D printed piece that will carry the power supply. Kim suggested we add some sort of temperature control for the LEDs, so we might make small cutouts around the sides of the box to allow some air flow.


Comments